
Creating a New User Guide
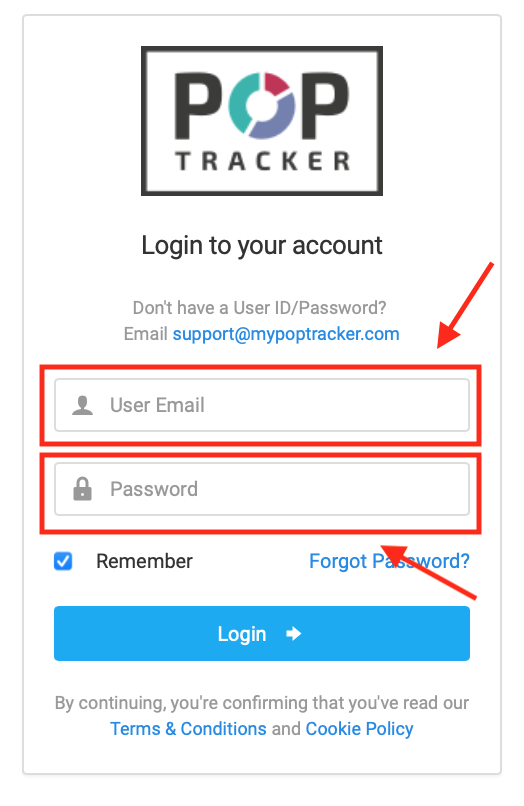
1) Login using your personalized POP Tracker credentials. This will default you to the campaign dashboard.
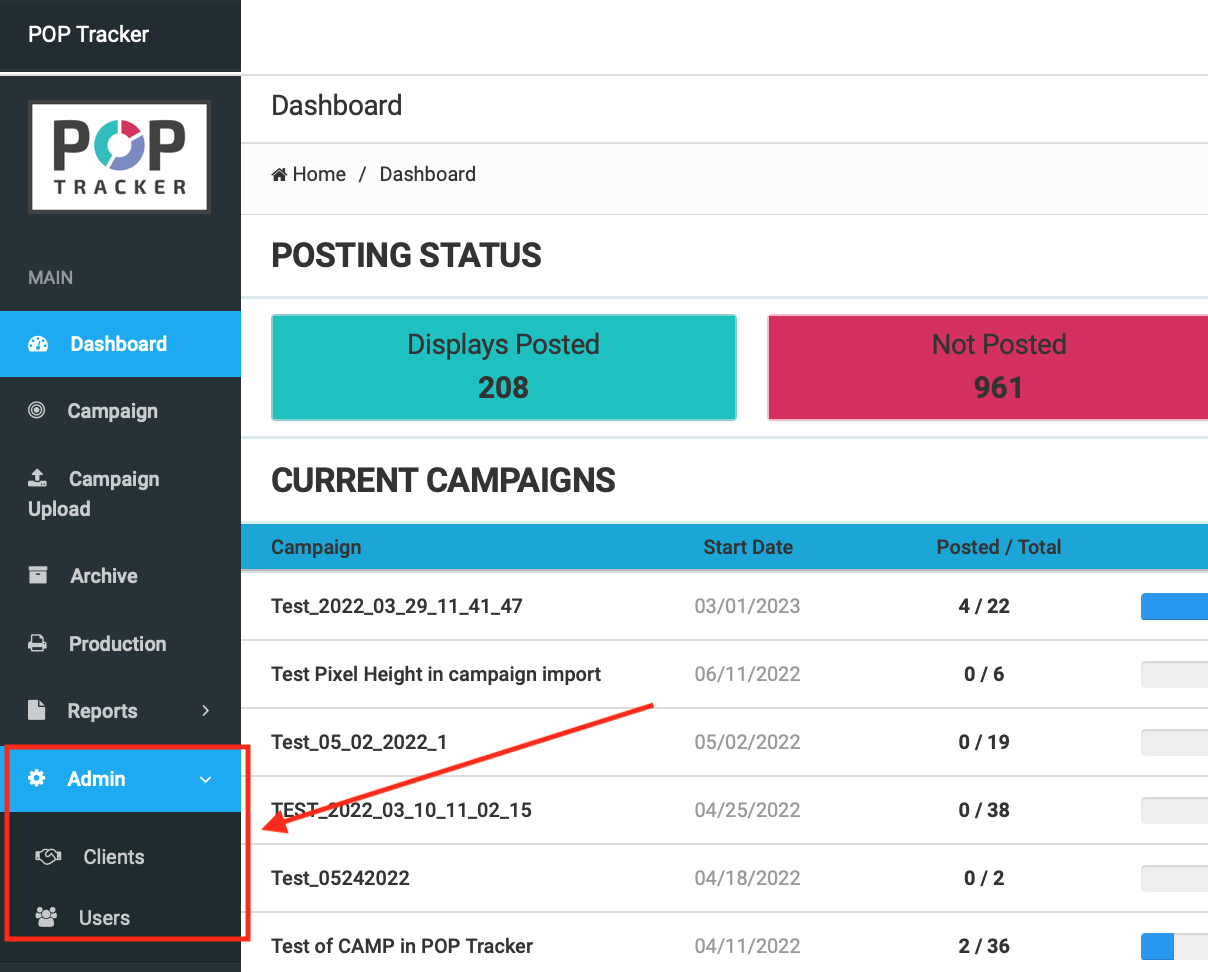
2) Along the left-hand side, there will be a tab titled “Admin” which when clicked on, will offer a drop-down menu with 2 options; “Clients” and “” For this particular guide, you’ll want to select “Users.”
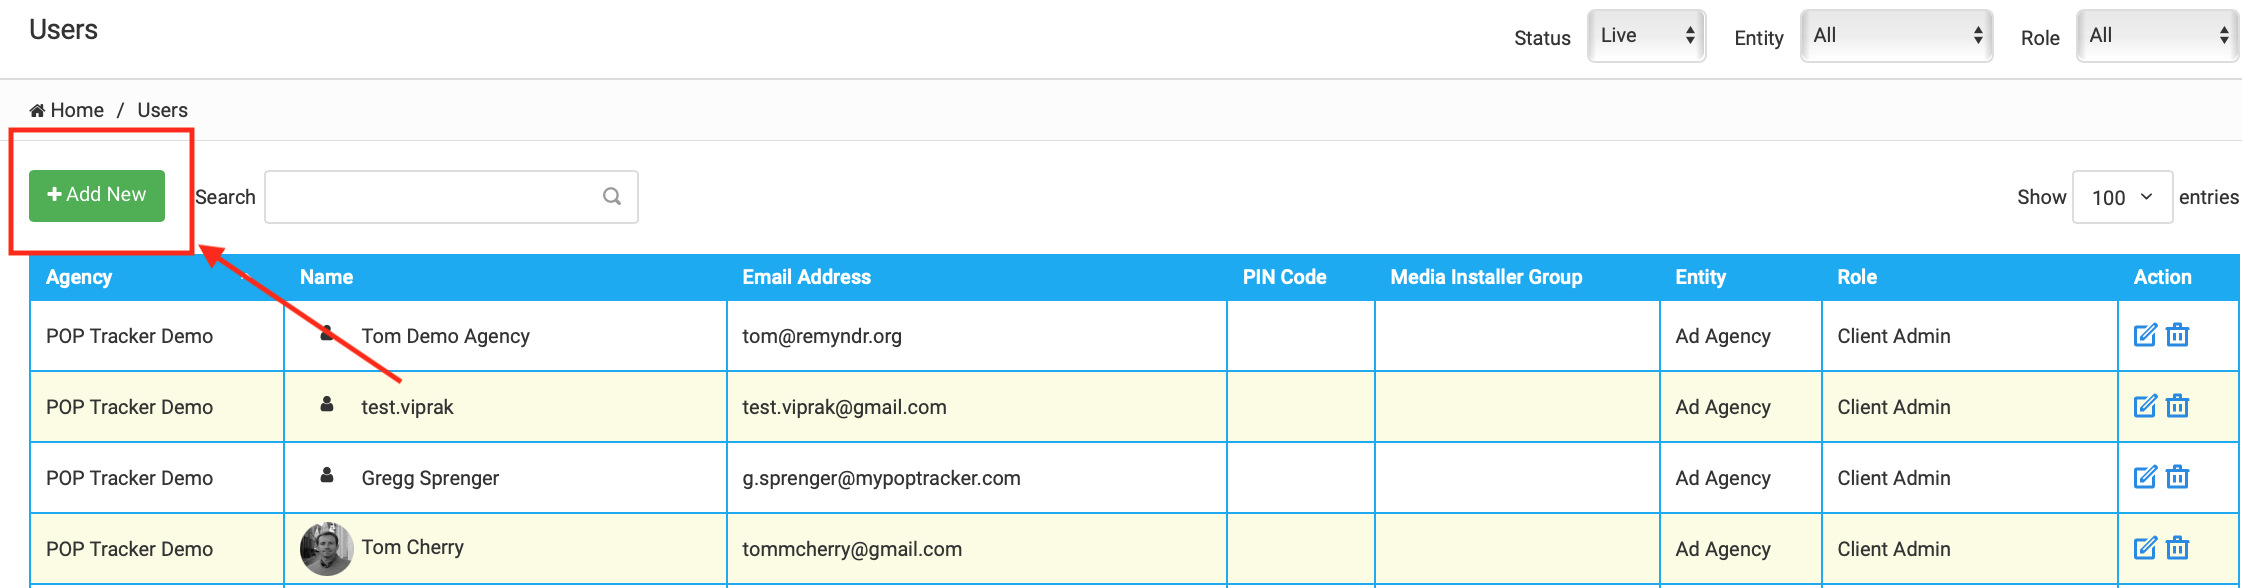
3) On this screen you will see a table of existing users. In the top left corner of the table, there will be a green button that says, “Add New” and you’ll want to select it.
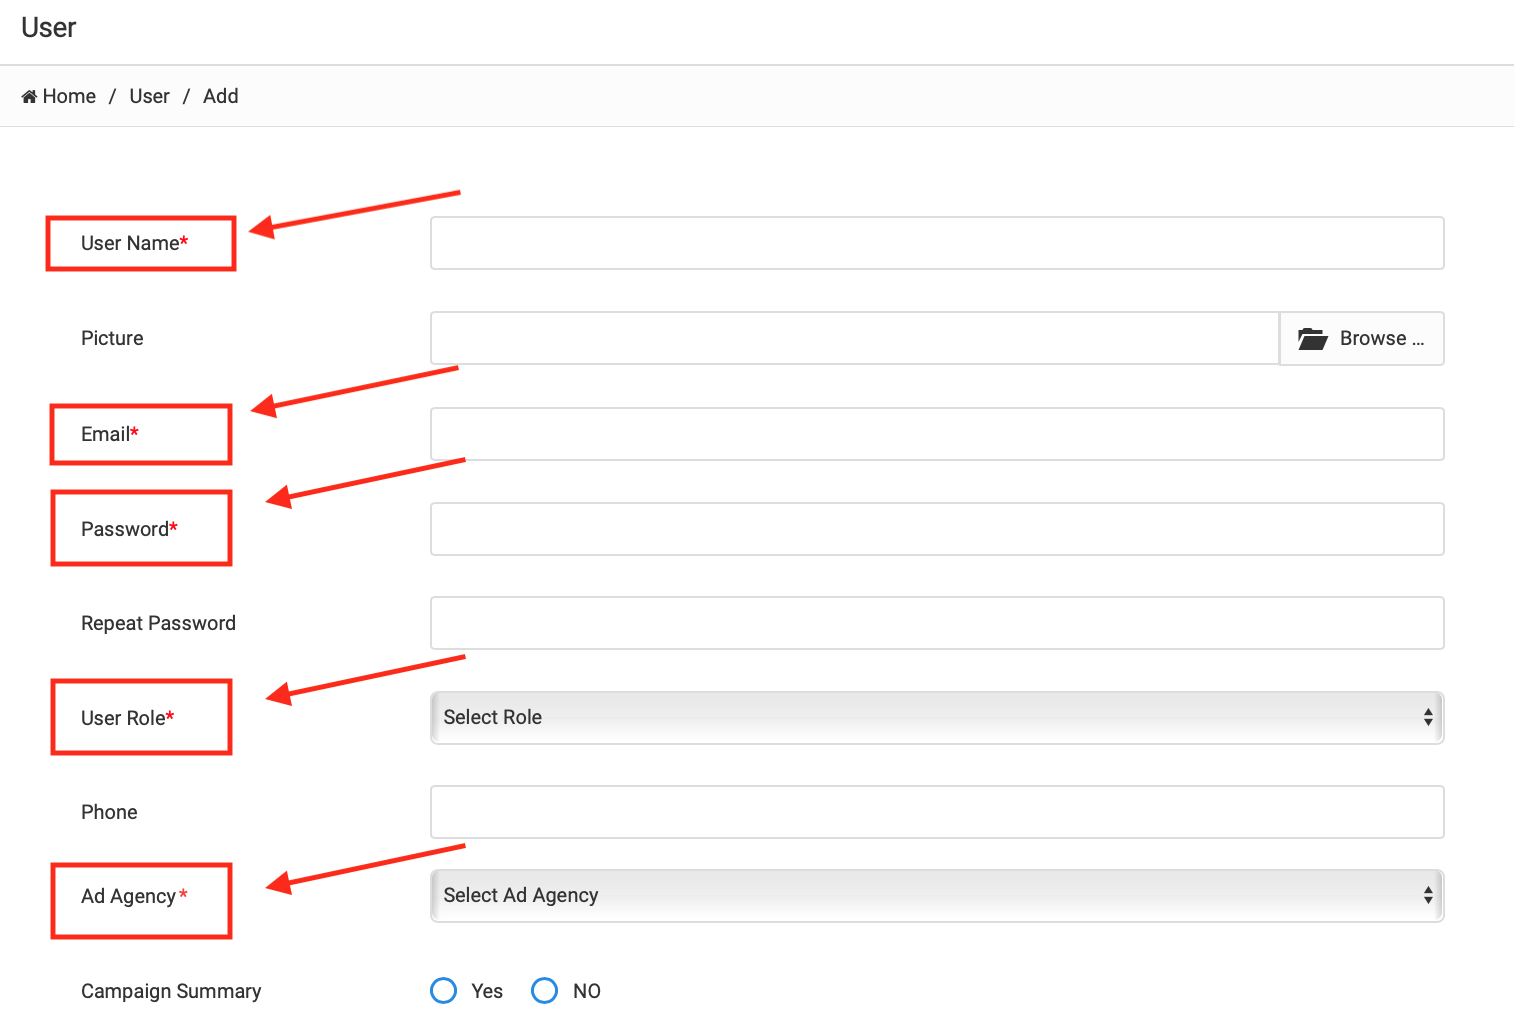
4) Next, fill out all the information fields for the respective user you wish to add. Fields marked with a red asterisk are required.
5) Once you’ve filled out all the necessary information, there is a green button that says “Save” on the bottom of the page. Once you hit that button, you’re all set! If you would like to inform the new user of their login credentials, you can hit the button adjacent to the “Save” button which says, “Save & Send Welcome Email” and an automated message will be sent to the provided email.

6) Always note that you can go back and edit any information for any user previously added. You can do this by going to the action column on the right end of the row of the client you wish to edit. This can be done by hovering over the pencil and square icon. The action column also allows you remove users.

POP Tracker Support - support@mypoptracker.com